How To: Poach an Egg
I've returned from my mini break in D.C. I've still got to sort through my photos and do a bit of editing, blah blah blah, but I'm going to be sharing some delicious restaurants that we visited. Unfortunately, I'm back at work today but guess what? I'm heading to North Dakota on Thursday. It's for work and I'll be in the middle of nowhere, but I've never been so I'm embracing it. I'll only be away for about 3 weeks before I have to come back to go to France - heyoh! - but being away from my kitchen will mean fewer posts. I have a few prescheduled posts ready to go, as well as a handful of photos that need to be edited and turned into posts, so I'll still have a presence; it just won't be daily like it's been for the past few months.
 So, there are so many tricks out there. Some people suggest swirling the water before adding the egg so that the mini whirlpool will swirl the egg whites back around the yolk. Another tip I hear all the time is to use room temperature eggs. Well, let's put those tips aside for a moment and discuss mine. I have five:
 Get your tiny saucepan and fill it with about 2 inches of water and mix in a little vinegar. My tiny saucepan is from Christmas Tree Shops and it was only $3; pretty sweet deal, huh? Anyway, add in the egg - no vortex necessary for such a small pot - and let the egg cook for about 3 minutes until the whites firm up.
 Use a spoon to gently flip the egg over - this is a great time to check if it's sticking to the bottom of the pan - and then let it cook for another minute on the second side just to make sure the egg is completely set. I'm into a super runny yolk so the total 4 minute cooking time is perfect for me. If you prefer a slightly thicker yolk, I'd add about 1 minute of cooking time to each side.
 Fish the egg out of the water with a slotted spoon and let them drain on a paper towel. Season with salt and pepper and then use as you choose.
Honestly, there are some harsh critics of poached eggs out there and they have this checklist with amazingly nitpicky criteria of what makes a good poached egg. For me, it's an egg that looks relatively pretty and in tact, a good and runny yolk, and a tender white.
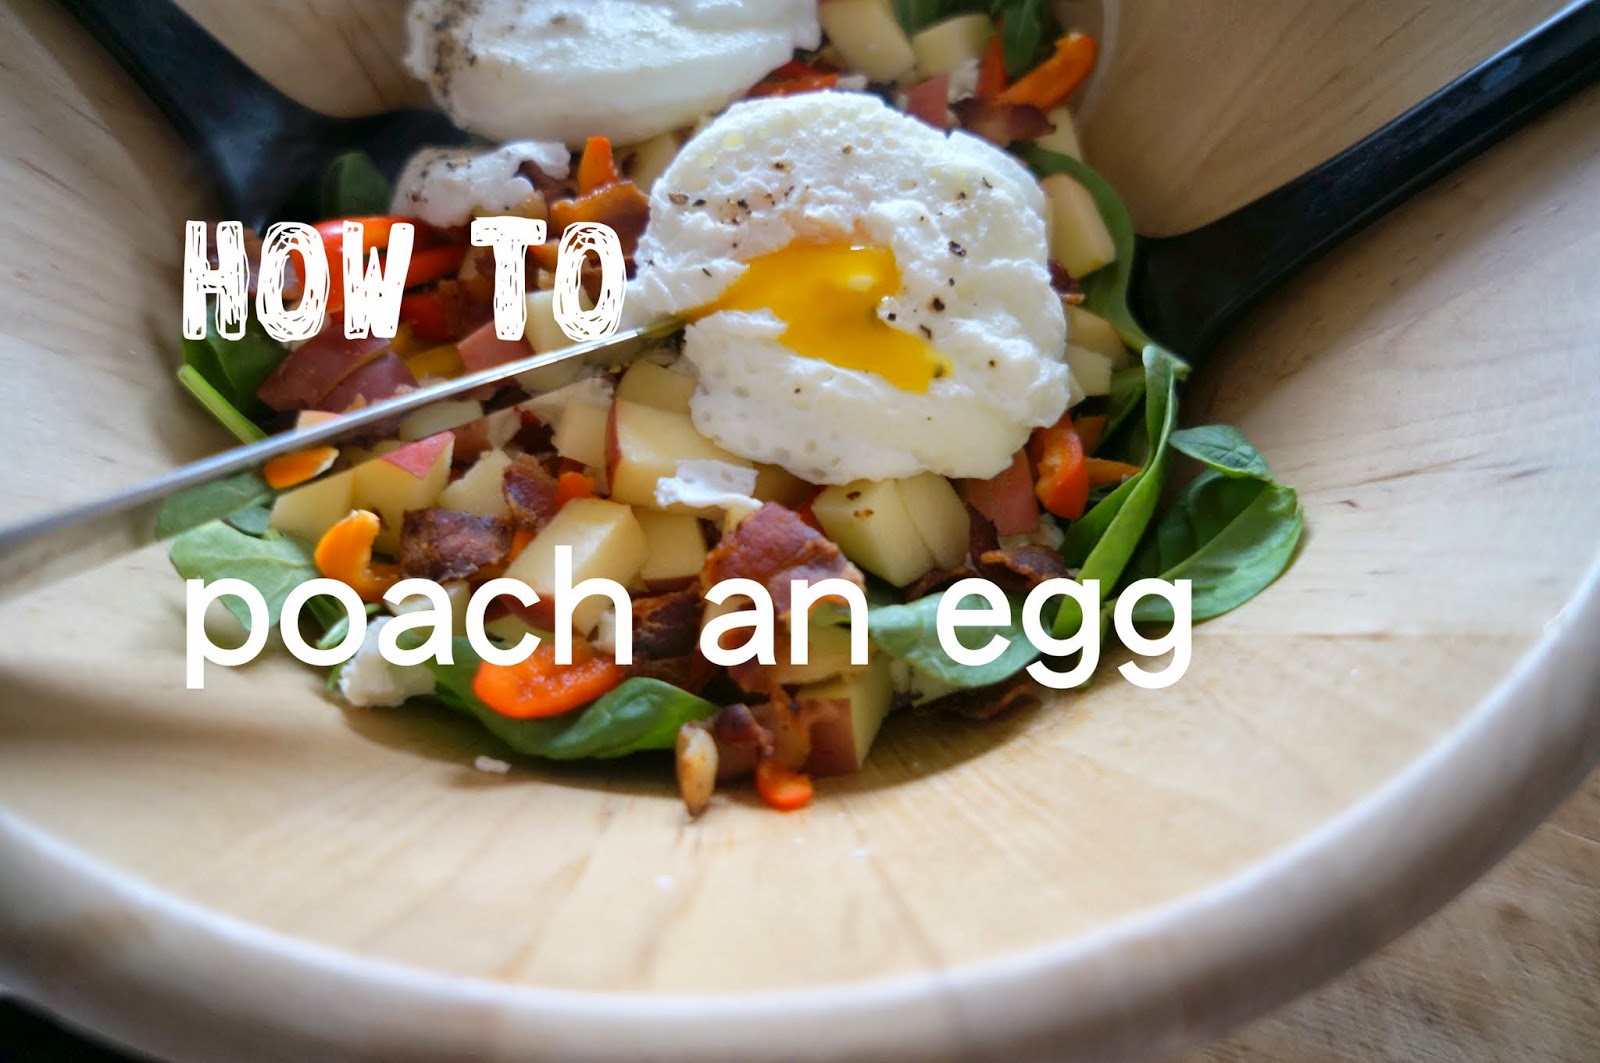
I plopped my poached eggs right onto a salad and it was super yum. Honestly, I probably should have flipped these guys over because the side that's showing in the photos below is the bumpy side (where the water was getting foamy) but the bottom side was so smooth and lovely. My bad! Oh well, it still tasted good and had a lovely texture, and that's the most important part, right?


In the meantime, today I'm sharing instructions on how to poach an egg. I'm sure this has been done to death but I want to share my tips and tricks.
Ingredients:
1 egg (super fresh)
salt & pepper, to taste
1 teaspoon white vinegar
water
- Use super fresh eggs. You can test the freshness of an egg by putting it in a big bowl of water. If it sinks it's only a few days old. If it's floating at an angle, it's probably about a week old. The fresher the egg, the firmer the egg whites will be.
- Bring the water to a boil and then reduce the heat until it's no longer violently bubbling. You want to know that the water is super hot (to make sure the egg whites set up quickly) but you don't want it to be bubbling so violently that it agitates the egg.
- Add an acid to the poaching liquid (e.g. lemon juice or white vinegar). Egg whites coagulate at a certain temperature. Lowering the pH of the cooking liquid makes the eggs coagulate faster because it lowers the normal coagulation temperature.
- Use a small saucepan and use just 2 inches of water. A wide and shallow pot is the typical vessel of choice but the less area that an egg has to spread out is better, right? And again, a shallow water depth means less space for the egg whites to spider out.
- Crack the egg into a separate bowl. You'll need this for ease of adding the egg into the tiny pot.
Got it?
Okay, so start by cracking your egg into a bowl.
Okay, so start by cracking your egg into a bowl.
Honestly, there are some harsh critics of poached eggs out there and they have this checklist with amazingly nitpicky criteria of what makes a good poached egg. For me, it's an egg that looks relatively pretty and in tact, a good and runny yolk, and a tender white.
I plopped my poached eggs right onto a salad and it was super yum. Honestly, I probably should have flipped these guys over because the side that's showing in the photos below is the bumpy side (where the water was getting foamy) but the bottom side was so smooth and lovely. My bad! Oh well, it still tasted good and had a lovely texture, and that's the most important part, right?
Here's the recipe page:
Comments
Post a Comment
I'd love to hear what you have to say!