New Kitchen Part 5: Cabinet Delivery, Assembly, & Installation
It's an exciting day when your kitchen's been demolished and you've been patiently waiting for your cabinets to be delivered and you get that call that says, "Hi, I'm the driver of the truck for your Ikea delivery. I'm about 10 minutes away."
 Urban Express called me on Friday morning (the day before my delivery [09/07/2013]) and an automatic robot lady started speaking immediately saying that my delivery window would be from 11am to 3pm. Then, on Saturday morning, robot lady called again to say that the window was now 12pm to 4pm and she also texted me with that same message. At around 12:30, I got the phone call from the driver to say they were just a few minutes away. Overall, I had a great experience with UX. I know there are a ton of complaints about their service but thankfully, our delivery went rather smoothly.
 Unfortunately, we were missing a few items - some shelves, drawer dampers, and most importantly, our dining table - but we called Ikea customer service and they started a case number for us and then called us a few days later to schedule the delivery of our missing stuff. If you have anything missing from your order or any visibly damaged items, you must report them within 72 hours. If you get an order like ours, you'll have a room full of boxes and it will be intimidating and overwhelming but it's important to take some time to check off each item and inspect every box.
Another unfortunate thing was that later, when we were installing the shelves and drawers, we discovered that two of the drawer bottoms were completely cracked. The packaging didn't show any damage and the way that the drawers are packaged makes it difficult to inspect each piece (you have to tear off some plastic shrink wrap) so it wasn't until we tore into the boxes that we saw the cracks. We had to go to Ikea to purchase our sink (which wasn't in stock when we ordered our kitchen) so we just brought it along and exchanged it (but not without some difficulty). We also returned a bunch of cover panels we decided we didn't want to use and it was great because it almost felt like we were getting the sink for free.
 I don't know whether or not every Ikea operates the same way but our location told us that the delivery company would unload the packages into one room and one room only. We couldn't ask them to put a few boxes over here, a few boxes in that other room, and be picky so we cleared out a space in the garage for our order. Our fridge and range were waiting in there (ever so patiently) so we pushed them towards the back to make room.
 The guys that delivered our order were really friendly and nice and asked us if we wanted a palette to rest our boxes on, in case of flooding, which I thought was considerate. Both of them spoke English but during the unloading, they were speaking to each other in their native tongue. It seemed like the older one (who was in the truck bringing things out to the ledge) was directing the younger one (who was bringing the boxes from the truck to the garage) on where each package should go and how he should stack them. I appreciated this a lot because we had some fragile items - like glass shelves and doors - that I was worried about.
I think we made access and unloading quite easy for the delivery men because all they had to do was pull up the truck as close to the garage as possible and then they just had to move the items (all 125 of them) a few feet instead of up a set of stairs, around corners, through narrow doorways, etc.
Admittedly, I was a little apprehensive about building the cabinets. However, it turned out to be a rather simple process. You just have to pay attention to the details in the pictorial directions and have the right tools on hand. I've made a list below of what I think are the important items you'll want to have for this project.
 I've sorted the tools I used into three categories: prep, assembly, and install.
Before you start building shelves, it's a good idea to mark your walls with what goes where. With a T-square (or L-square), just crudely mark some lines to give yourself an idea of your basic layout. This way, you know which cabinets you should be building first and how to arrange them as you build.
Once you're ready to start building the shelves, you'll need some tarps or sheets to lay on the floor to (1) protect your floor and (2) protect the cabinets. Even if you have carpet, you might want to lay something down just in case you drop some tack nails or spill some glue. The wood glue is optional, but because quite a few wooden pegs are involved in the assembly, we wanted to make sure they were extra secure with a dab of glue.
Scissors are great for opening up all the little tiny plastic bags full of screws and nails and doodads and tape is great for sealing those bags back up if you're not ready for all of the hinges and covers. We wanted to wait until everything was installed to put in the doors and shelves so we definitely made use of the tape. Oh, and a marker is good for writing which cabinet the parts belong to; we just scribbled things like, "sink base" and "pantry cab" right on the tape so that later on, we wouldn't be confused.
To install the wall cabinets, you'll be hanging the cabinets on a railing. Ikea provides the railing but they don't provide the screws to actually install it so you'll need some heavy duty screws and a studfinder to make sure you're securing the railing properly. Please, please, please, use good judgment and consult someone more knowledgeable if you're not a handy person because if you install the railings incorrectly, the cabinets could come crashing down and that is not what you want.
When we were ready to build, we laid down a set of pink sheets, tore open the box carefully - we actually just pulled apart the glued seams of the package so as not to scratch the cabinet parts accidentally by using a box cutter - and worked on top of the fileted box, since the cardboard offered a bit more padding.
 If you're not a visual person, you might hate the Ikea instructions but I actually like them. Sure, if they threw in a few words here and there, it would definitely be easier to follow but guess what? These instructions are universal and there's something to be said for that.
 In just a few hours, we were able to assemble all of our wall cabinets plus one base cabinet. It really didn't take us v. much time. After the cabinets were delivered and unloaded, we spent about an hour going through the delivery to make sure we had everything, and then we started building until it was dinner time. It probably took us about 30 minutes to build the first cabinet because we were being incredibly meticulous but once we got the hang of it, most of the cabinets only took us 15 minutes to slam together. Of course, it did take us some time in between each cabinet to look at our list to figure out which one we wanted to build next and then we had to go into the garage and shuffle through the huge pile of boxes to find it.
Frankly, we were surprised by how humongous the wall cabinets looked once they were built, but we had to remind ourselves that we had gotten rid of the soffit so these were a whole 9" taller than we were used to.
I had been a bit apprehensive and worried that we wouldn't have enough storage but once the cabinets were built, my sister said that our actual problem would be that we'd have too much space and not enough stuff to fill it with.
 Six cabinets built in 3 hours. Not bad, right? We set the cabinets in the order they'd be hung on the walls and placed them gently on top of the opened cardboard packages, again to protect our floors and our cabinets.
 The next morning (Sunday) we got up bright and early and started building the pantry and the base cabinets. The pantry is huge and I'm really excited at the prospect of having lots of space to store lots of stuff. The pantry cabinet package was so heavy we had to open up the box in the garage and carry in the components one at a time.
George Michael helped us build the cabinets too.
 Look at that pantry cabinet - it goes from floor to ceiling. By the way, you may notice the platform on the floor. We are building our cabinets on top of a wooden platform made of 2x4s. I preferred the idea of building on cabinets instead of using the default legs and toekicks from Ikea. It's easier to level the platform and install the cabinets on top instead of leveling each cabinet by itself.
 Here's a shot of the railing for the upper cabinets and the first cabinet that was installed - the corner - proudly sitting up on the wall. Installing the upper cabinets was easier than I expected. They aren't too heavy, especially if you have help, and once they're hooked onto the little pegs, it's smooth sailing. Please make sure to use heavy duty screws and make sure they are drilled directly into sturdy studs to make sure your cabinets don't eventually come crashing down off of the walls. If you're not a handy person or you aren't sure of what you are doing, definitely hire a professional because this is a definite safety hazard if done incorrectly.
 We also installed some lights under the cabinet that's over the sink and some lights inside of our pantry. It's all v. exciting. They're LED and their supposed bulb life is 20,000 hours. These lights are more for show than function (though they are still functional) so I don't think they'll get used too often but even if they do, it'll be years before they'll need to be replaced. Even if you left them on for 1 hour per day, they'd theoretically last almost 55 years.
 Tada! The only cabinet missing in this photo is an open shelf cabinet that's attached to the corner cabinet. But like I've said before, I'm trying not to give too much away in each post so that there are a few surprises in the final reveal.
 During our second day of assembly, we managed to build a bunch of base cabinets after we finished building the huge pantry and installing the wall cabinets.
 Obviously, during the workweek we have significantly less time to spend on this renovation but we did manage to get a bit of work done in the 2 to 3 hours between making and eating dinner and going to bed. Seriously, by the third cabinet, my sister and I had become pros at assembling the cabinets so that things were running pretty smoothly by cabinet # 12. If you want to hire someone to build your cabinets, we are your gals!
On Monday evening, we finished putting together the cabinets surrounding the refrigerator so all that was left to do were the cabinets for the island. We held off on assembling those until we could get the rest of the cabinets installed (there was quite a premium for floor space at this point) and so we could call in someone to refinish our hardwood floors.
 On Tuesday, we started installing the base cabinets. We were obsessively leveling the cabinets to make sure everything was perfect.
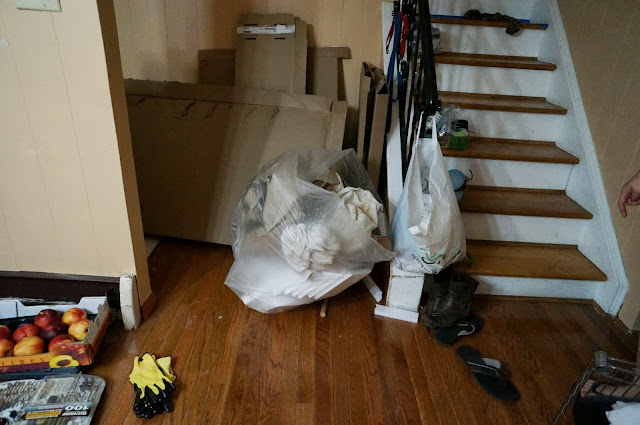
 And of course, as we were building and installing, we had a growing pile of cardboard and garbage piling up in the corner. Please recycle your cardboard!
 On Wednesday evening, we installed the rest of the base cabinets along the sink/pantry wall and on Thursday, we installed the remaining cabinets along the stove/fridge wall. On Friday, the dishwasher got hooked up to the electric line and on Saturday, the exhaust hood got installed. If you're curious about the white-ish color of the hood, don't worry. It's just the protective covering which will get peeled off when the time is right.
Building and installing the platforms, cabinets, pantry lighting, dishwasher, and exhaust hood took us about a week [09/07/2013 to 09/14/2013] which I thought was pretty good. We weren't staying up nights to do it either. As you read above, the bulk of the cabinet assembly was done over the weekend and the installation was done little by little over the course of the week. If you're considering a DIY renovation but you're concerned about being able to accomplish everything while juggling a full-time job - let me say, it can definitely be done.
 Over the weekend, we had our floors refinished and then we were able to put together the cabinets for our island. And once that was done, we were able to call the countertop company to come measure and template. Details of the floor refinishing process and countertop installation will be coming soon. Thanks for reading.

Another unfortunate thing was that later, when we were installing the shelves and drawers, we discovered that two of the drawer bottoms were completely cracked. The packaging didn't show any damage and the way that the drawers are packaged makes it difficult to inspect each piece (you have to tear off some plastic shrink wrap) so it wasn't until we tore into the boxes that we saw the cracks. We had to go to Ikea to purchase our sink (which wasn't in stock when we ordered our kitchen) so we just brought it along and exchanged it (but not without some difficulty). We also returned a bunch of cover panels we decided we didn't want to use and it was great because it almost felt like we were getting the sink for free.


I think we made access and unloading quite easy for the delivery men because all they had to do was pull up the truck as close to the garage as possible and then they just had to move the items (all 125 of them) a few feet instead of up a set of stairs, around corners, through narrow doorways, etc.

Before you start building shelves, it's a good idea to mark your walls with what goes where. With a T-square (or L-square), just crudely mark some lines to give yourself an idea of your basic layout. This way, you know which cabinets you should be building first and how to arrange them as you build.
Once you're ready to start building the shelves, you'll need some tarps or sheets to lay on the floor to (1) protect your floor and (2) protect the cabinets. Even if you have carpet, you might want to lay something down just in case you drop some tack nails or spill some glue. The wood glue is optional, but because quite a few wooden pegs are involved in the assembly, we wanted to make sure they were extra secure with a dab of glue.
Scissors are great for opening up all the little tiny plastic bags full of screws and nails and doodads and tape is great for sealing those bags back up if you're not ready for all of the hinges and covers. We wanted to wait until everything was installed to put in the doors and shelves so we definitely made use of the tape. Oh, and a marker is good for writing which cabinet the parts belong to; we just scribbled things like, "sink base" and "pantry cab" right on the tape so that later on, we wouldn't be confused.
To install the wall cabinets, you'll be hanging the cabinets on a railing. Ikea provides the railing but they don't provide the screws to actually install it so you'll need some heavy duty screws and a studfinder to make sure you're securing the railing properly. Please, please, please, use good judgment and consult someone more knowledgeable if you're not a handy person because if you install the railings incorrectly, the cabinets could come crashing down and that is not what you want.
When we were ready to build, we laid down a set of pink sheets, tore open the box carefully - we actually just pulled apart the glued seams of the package so as not to scratch the cabinet parts accidentally by using a box cutter - and worked on top of the fileted box, since the cardboard offered a bit more padding.


Frankly, we were surprised by how humongous the wall cabinets looked once they were built, but we had to remind ourselves that we had gotten rid of the soffit so these were a whole 9" taller than we were used to.
I had been a bit apprehensive and worried that we wouldn't have enough storage but once the cabinets were built, my sister said that our actual problem would be that we'd have too much space and not enough stuff to fill it with.


George Michael helped us build the cabinets too.


On Monday evening, we finished putting together the cabinets surrounding the refrigerator so all that was left to do were the cabinets for the island. We held off on assembling those until we could get the rest of the cabinets installed (there was quite a premium for floor space at this point) and so we could call in someone to refinish our hardwood floors.


Building and installing the platforms, cabinets, pantry lighting, dishwasher, and exhaust hood took us about a week [09/07/2013 to 09/14/2013] which I thought was pretty good. We weren't staying up nights to do it either. As you read above, the bulk of the cabinet assembly was done over the weekend and the installation was done little by little over the course of the week. If you're considering a DIY renovation but you're concerned about being able to accomplish everything while juggling a full-time job - let me say, it can definitely be done.

I really couldn't stop reading every stage of your kitchen restoration story—it's like a do-it-yourself novel. I'm very jealous of the Urbane Bronze cabinets' style, and the LED lighting is even better. A touch of genius! And while we're talking about craftsmanship, have you thought about highlighting your efforts with a custom wood piece? Imagine the peace that Trailblazer Woodworks could create in your kitchen. I can't wait to read more about the floor refinishing and countertop installation. Keep up the fantastic work.
ReplyDeleteExciting progress in the kitchen renovation journey! Part 5 is all about the pivotal moment of cabinet delivery, assembly, and installation. Can't wait to see how these pieces transform the space! 🛠️🔨 #KitchenRenovation #HomeImprovement
ReplyDeleteI'ven read your blog its so intresting and amazing blog it ehance my knowledge and i've get new words from thishttps://intowninteriors.com/
ReplyDeleteAt the heart of Intown Interiors lies a visionary design philosophy that blends artistry with practicality. Drawing inspiration from diverse influences, including contemporary trends and timeless classics, their designs transcend fleeting fads, creating spaces that stand the test of time. Each project is approached with a keen eye for detail, thoughtful spatial planning, and a deep understanding of the client's vision and lifestyle.